Optimizing Photos for Facebook Display

It’s no secret that the ‘ol Book of Faces can be a great marketing tool for photographers as well as just a generally fun place to show off some family photos. Facebook, however, has a tendency to compress, convert, or otherwise mangle your photos if you don’t do some image prep ahead of time to maximize their display quality. Here are some steps I’d recommend to optimize your images for Facebook display. I recommend using Photoshop but you could certainly mimic these settings in Lightroom or Capture One, for a more direct export.

Step 1: Resize Your Image
The first thing we want to do is resize the image on our end before upload. (go to image>image size.) This will ensure that we have more control over the resize process and will also shorten the upload time. The current max size is 2048 pixels on the longest edge, so this is what I’d recommend. You can leave the PPI (“resolution”) value at 72. PPI is just a tag, and it doesn’t affect screen display.
I leave resample at “bicubic” and I will manually apply some sharpening in the next step. I like to do the sharpening manually, but you may find that a “bicubic sharper” resampling, or one of the other resize options does the trick for you without additional sharpening. Adobe recommends “bicubic sharper” for downsizing an image, but since I like to sharpen manually, I’ll stick with the standard bicubic. More info on that setting here.
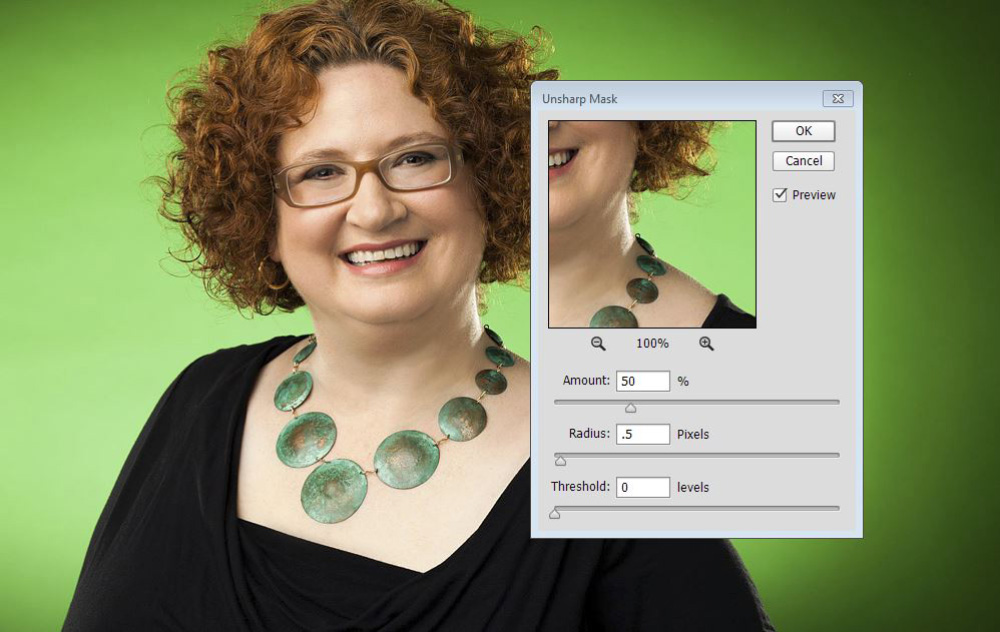
Step 2: Sharpen for Screen
Next I use “unsharp mask” to apply some sharpening. (go to filter>sharpen>unsharp mask). I like to do this manually so I can tinker with the sliders. For this type of image, I find that moderate settings are best but, for food or product photos, I may dial the settings up a bit. This is where your own personal taste comes in.
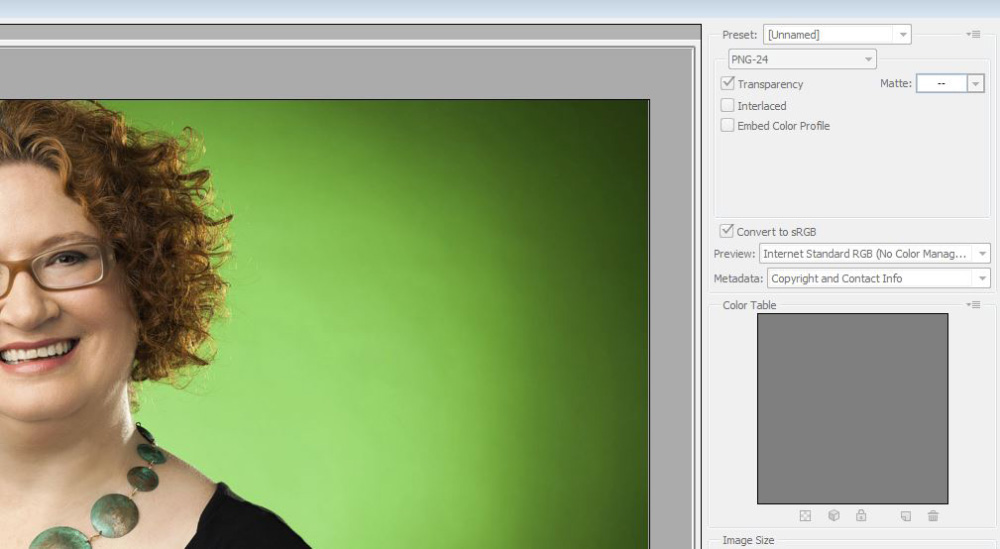
Step 3: Save for Web
The final step is to save the image. I like to use the legacy “save for web window” – file>save>save for web (ctrl+alt+shift+s). You can also use file>export. I find that PNG format works best for Facebook (especially for images like this one that have a gradient background), but JPG also works just fine for most images when saved in the highest quality (100). Make sure if you are in something other than sRGB, that “convert to sRGB” is checked. Most browsers don’t obey color profiles, so sRGB is pretty much a web standard. I leave my copyright and contact metadata setting on as well. Stripping metadata will make the image smaller and faster to load, but I prefer to keep my copyright info embedded.
Final Notes
You’re done! Keep in mind that this method is for large 2048 pixel images. Cover photos will need to be exactly 851 pixels wide by 315 pixels high and profile photos will need to be 160 pixels by 160 pixels. Here is a guide to all the various image sizes used on social media.
If you prefer to automate the process for 2048 pixel images, you can download my free Facebook Resize Photoshop Actions below.
Here is the above photo as seen on my Facebook page. If you like this post, please stop by and support the page.
[wpdm_file id=2 title=”true” ]
Gorgeous lighting and model! Thanks for the inspiration.
Thank You!