
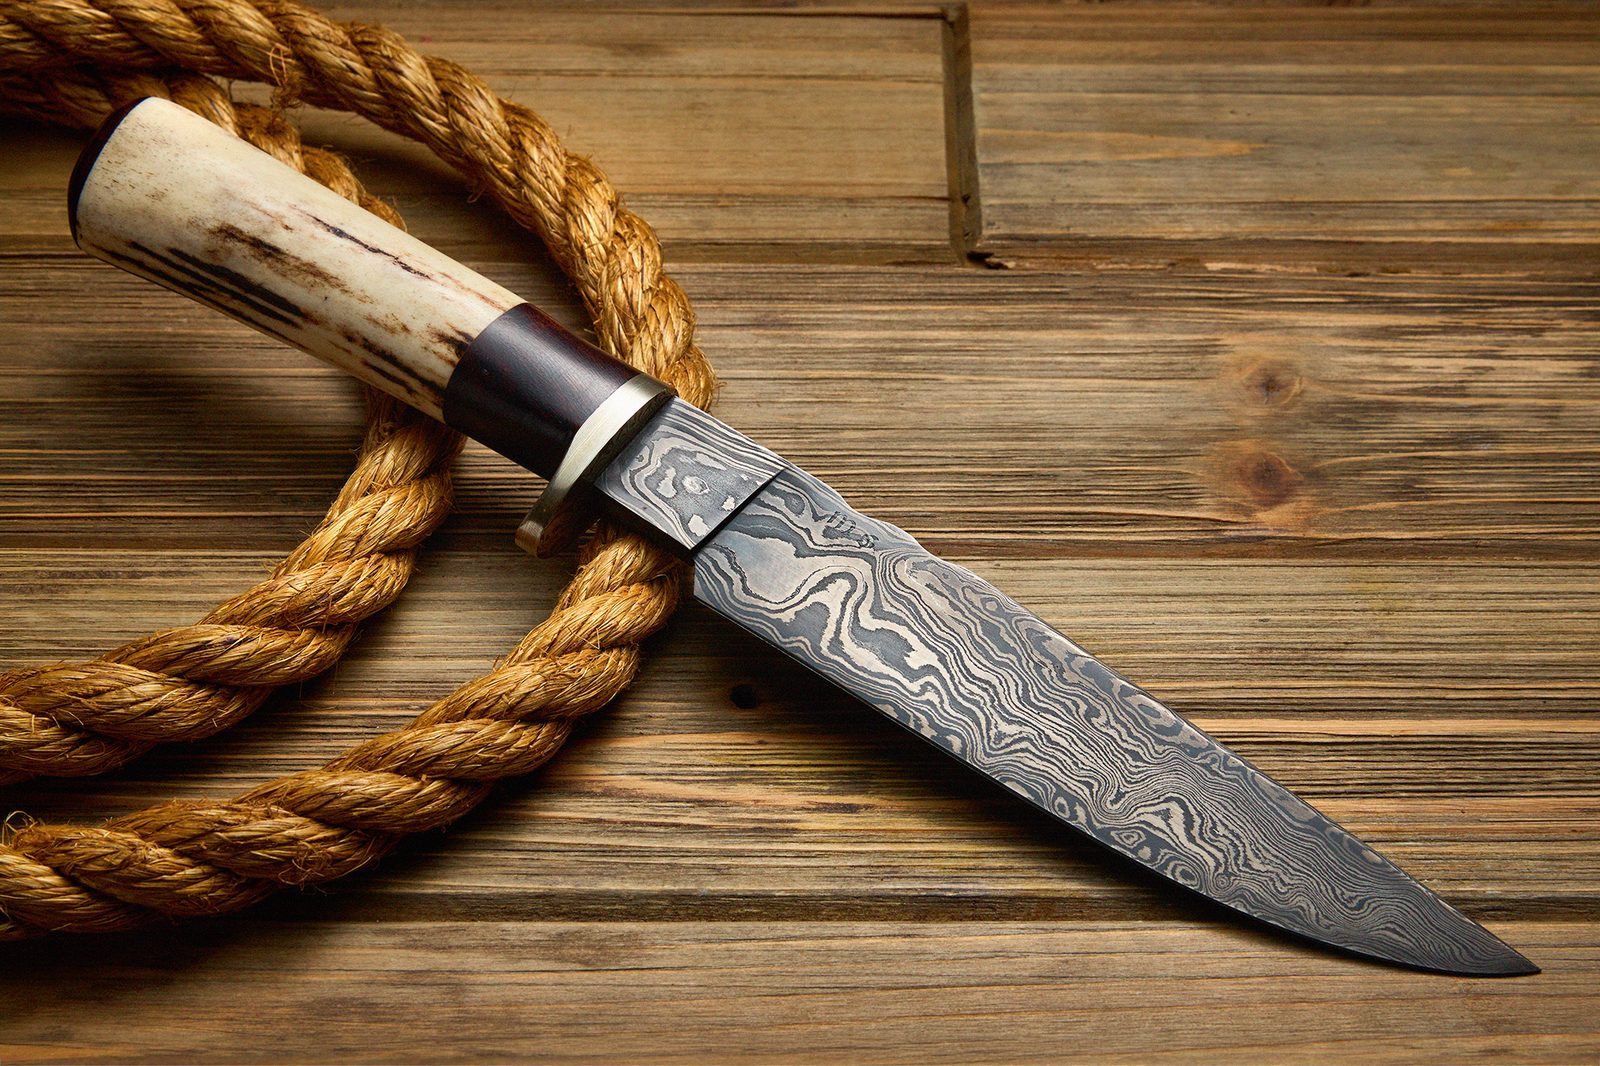
How to Photograph Knives: Lighting a Custom Damascus Blade
I’ve known knife purveyor and maker Dave Ellis for a lot of years. He met me back when I was teaching guitar full time, became my student, and ultimately a good friend. Later down the road, Dave hired me for photography and website work, and even took me under his wing to learn knife making. He recently had me rework his website at Mastersmith.com and photograph one of his custom damascus blades for the banner. You could say that Dave and his colleagues are responsible for getting me into product photography, and for me eventually turning photography into a full time career. These days that work includes collector blades that sell for six figures, but the setup below is one anyone can build. Everything here was shot in my San Diego studio with a single light, and if you are new to knife photography, the budget version near the end will get you started for a few bucks.
Why great knives deserve great photos
- Resale. A clear photo in great lighting provides more information about the craftsmanship and materials, and does so accurately.
- Mood. Styling, propping, and background choices convey what the knife is all about and tell a story that helps sell it. For this blade we were going for rugged, hand forged vibes, calling back to old school bowies and fighters with the rustic wood and rope theme. I also wanted to nod to the 1990s knife magazine aesthetic, since this is an older website and part of the reason we reworked it was to keep the light burning on a lot of vintage articles.
- Memories. I gave away or sold most of the custom knives I’ve made, and most makers do the same. We like to see them being used and admired. A great photo preserves the record of the knife for its maker.
The setup
The wood surface I built
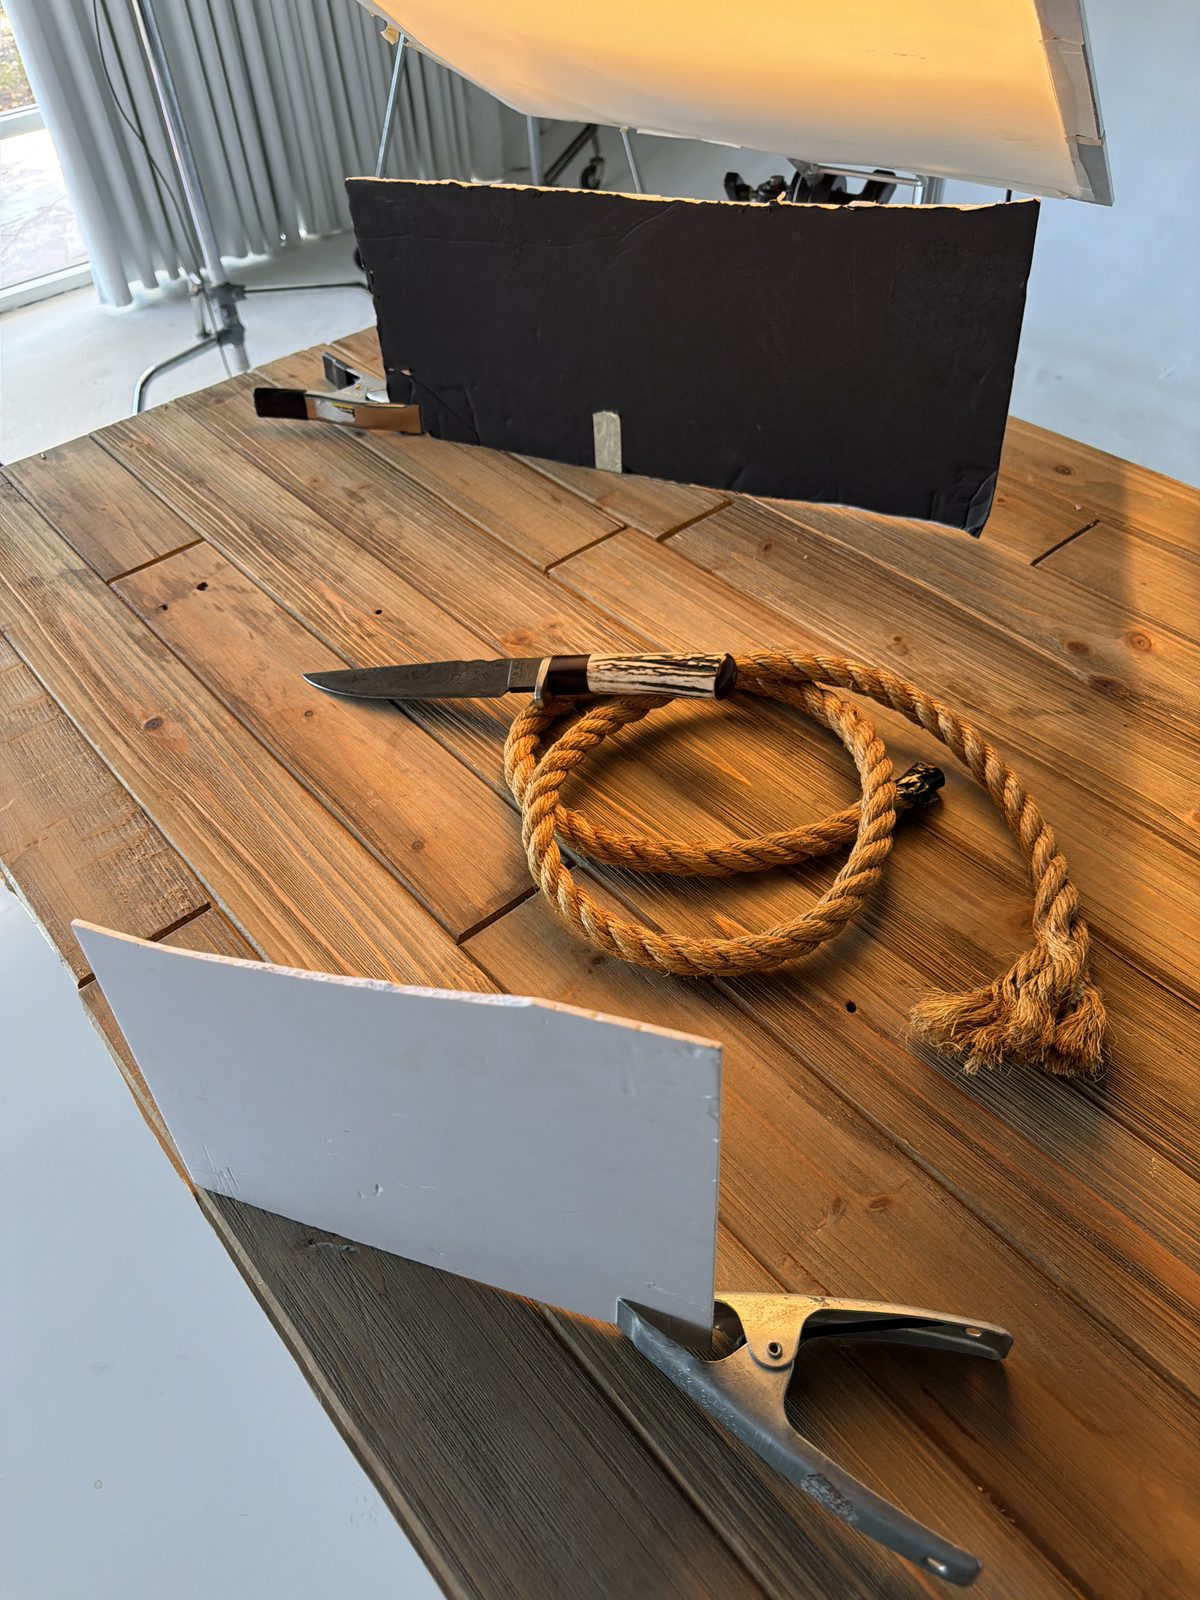
I built this surface out of decorative wood from Lowe’s. These thinner rustic pieces are made for wood wall decor applications, and fence wood is another good choice since it’s thin and light. You don’t need thickness for this, and a light surface is easier to transport and store. I nailed some cross bracing to the back, applied some stain, and that was about it. I’ve used this piece in hundreds of photo shoots, from food to product to tools. Wood is versatile, and it’s worth having the real thing around rather than wood printed nylon material.
The rope
The rope creates depth by letting one side of the knife angle up instead of lying flat on the surface. It also reinforces the old west vibe, and calls the subconscious back to one element of the ABS Mastersmith test: the rope cut. I’m not even sure where I sourced this piece. It has been in my studio for many years.
Lighting
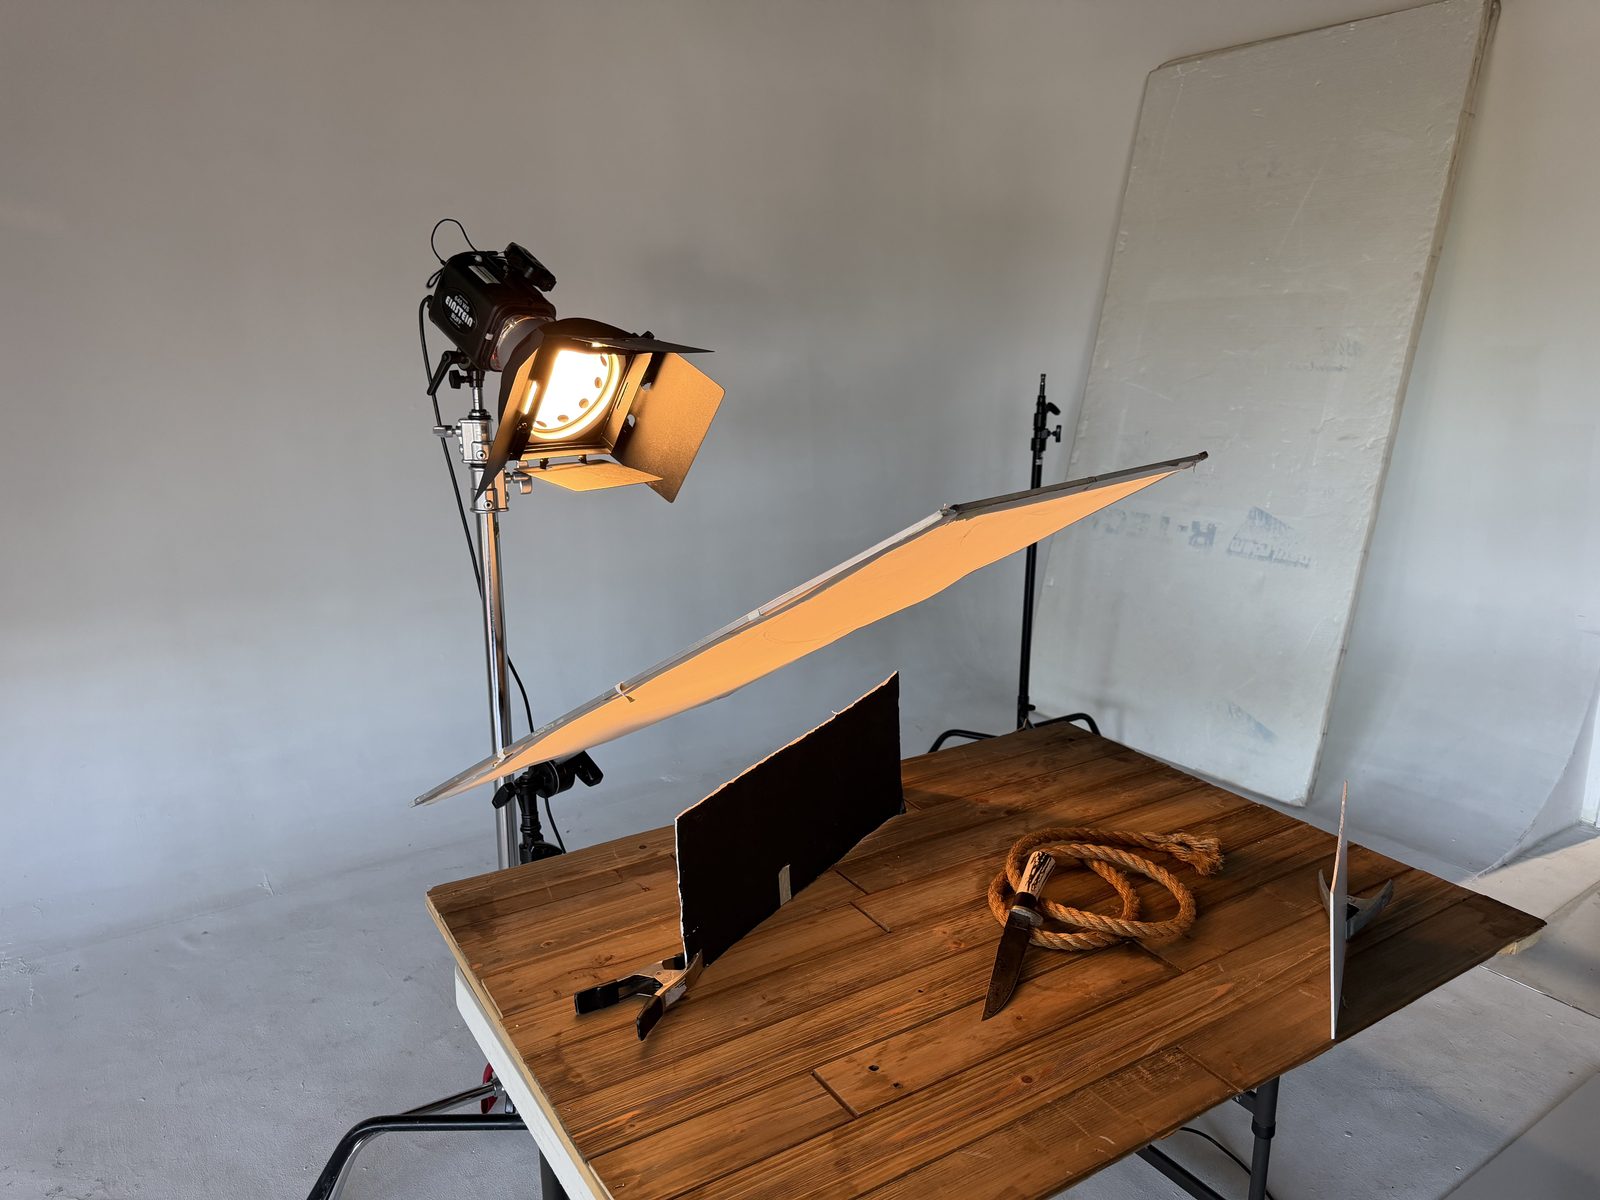
This is a single light setup. It’s nice to have two lights in some cases, so you can control the handle and blade somewhat independently, but for this knife it didn’t warrant a second light. You can do a lot with a single light and some knowledge.
The light here is a Paul C. Buff Einstein flash triggered by a camera mounted radio. I’ve installed a barn door attachment, which lets me direct the light toward only certain parts of the diffusion screen to finesse the result. You can’t really do this with something like a softbox attached to the light. The diffusion material is Rosco 3026 Tough White, though an affordable roll of diffusion fabric like this one works too. The frame is from B&H Photo, held up by a shorty C-stand.
I also added black and white foam core boards to the surface for adding and subtracting light in select areas. The white board bounces a bit of light back into the shadow side of the handle, and the black board subtracts a little from the upper wood surface behind the knife.
The Amazon link above is an affiliate link. As an Amazon Associate I earn from qualifying purchases.
Shoot tethered
For product photography, and most in studio photography, I’m pretty much always tethered to Capture One Pro so I can see my images on a larger screen instantly and scrutinize the details. There is always something you’ll miss on the back of the camera, so anything you can do to make your preview larger is beneficial. On a budget, you can connect your camera directly to a TV over HDMI. Shooting with a phone, you can AirPlay or Chromecast to a TV or iPad.
Getting the color right
In knife photography, color matters. My studio lighting is stable, but I still use a gray card like the X-Rite ColorChecker. Shoot it once your lighting is dialed in, before making your final frames, and use that gray as a reference in your software, or simply as a visual guide while editing. In mixed lighting it becomes even more important. I also set a fixed Kelvin white balance rather than trusting auto, so every frame in the set matches.
What changes with a mirror polish blade
In the video you can see me swap in a polished blade to demonstrate that this setup holds up with more reflective steel. You may need a larger diffusion screen for longer blades. Play with the angle of both the camera and the blade until the blade is reflecting the right amount of white material without going dull.
The budget version
This whole setup can be replicated with a strong LED work light, daylight from a window, or even hard sunlight, with a phone as your camera. If you don’t have a C-stand and a real scrim frame, I’ve seen plenty of knife makers use tracing paper on a homemade PVC pipe frame as their diffusion screen. White trash bags or a shower curtain make decent diffusion in a pinch. Black and white foam core is a few bucks at Michael’s or Hobby Lobby.
Post production
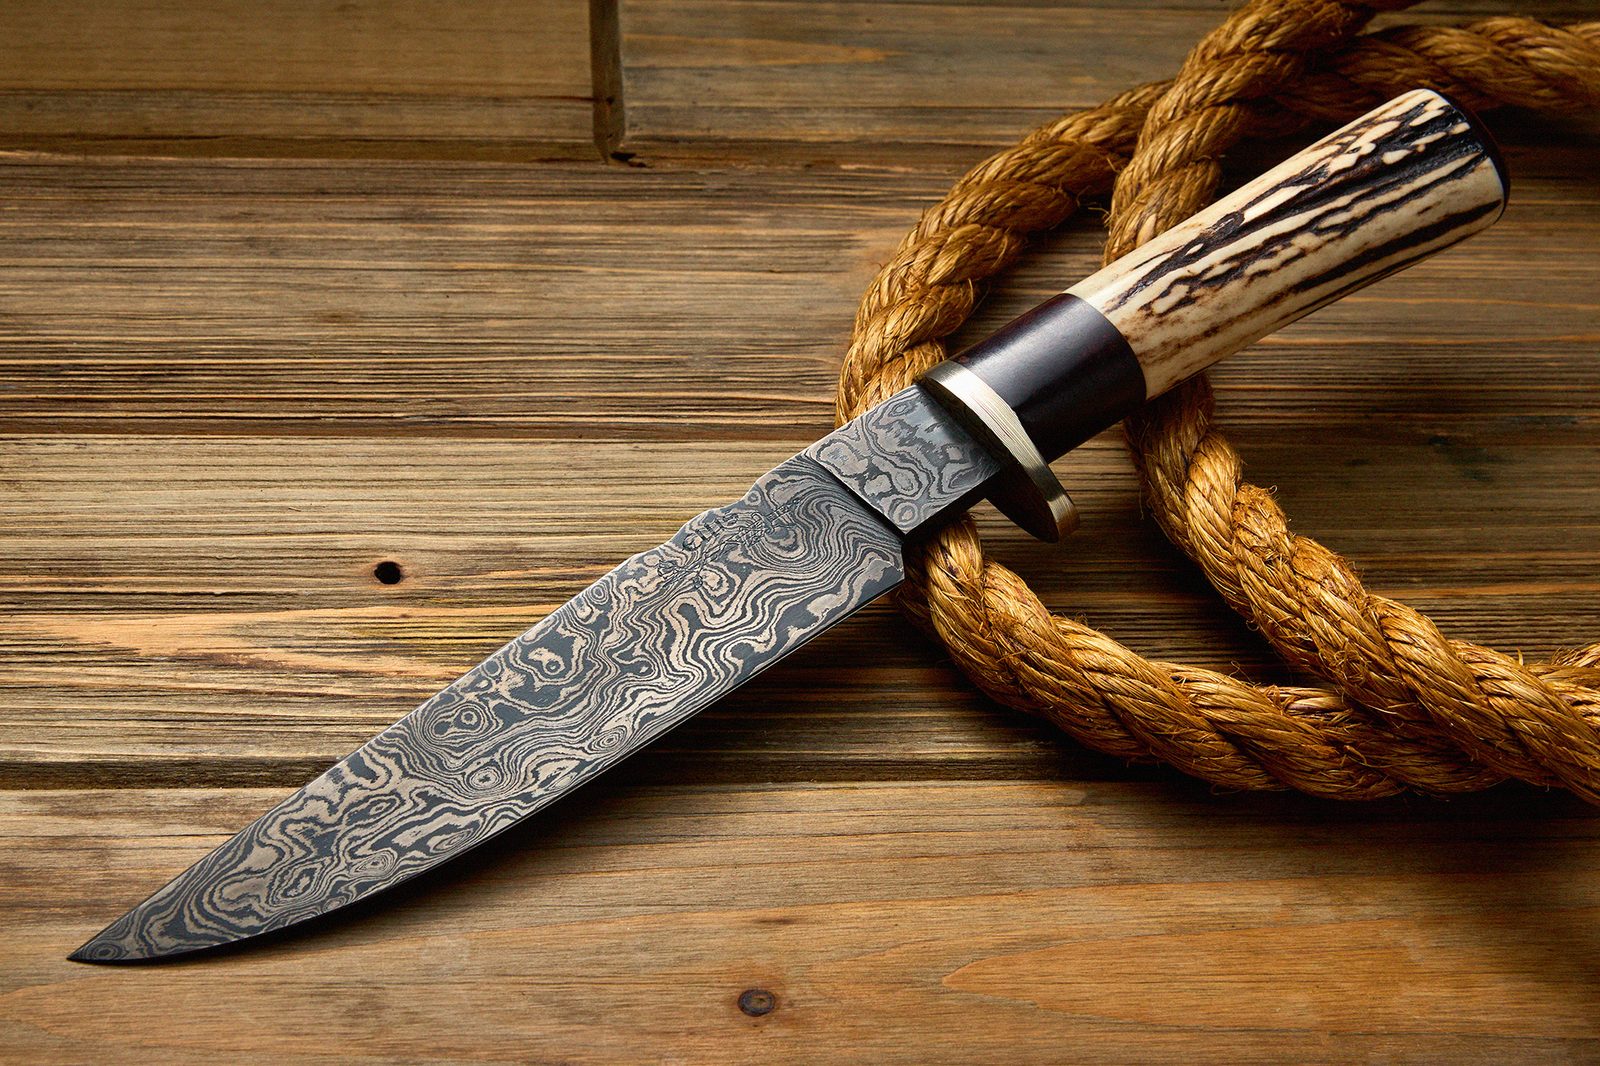
I ran these files through Photoshop with a very conservative treatment. One frame was cropped a bit tight, so I used generative fill to extend the wood and rope and re-crop. I healed some dust and grime on the wood surface, used the burn tool to slightly darken the logo and MS stamp, and used a levels layer to selectively brighten and darken here and there. A bit of unsharp mask on the blade makes the damascus pop.
Knife photography FAQ
What is the best lighting for photographing knives?
One flash through a big diffusion screen will take you further than most people expect. I shot everything in this article with a single Einstein strobe, barn doors, and a diffusion screen. A second light is nice for controlling the handle and blade separately, but it is not required.
How do you photograph a knife without reflections?
You do not really remove reflections, you control what the blade is reflecting. Aim the blade so it mirrors your diffusion material instead of the room, then adjust the camera and knife angles until the blade reads bright without going dull. Black and white cards fine tune it from there.
Can you photograph knives with just a phone?
Yes. Window light or an LED work light, tracing paper or a shower curtain for diffusion, and a couple pieces of foam core will get you a long way. The camera is the least important part of the setup.
Knife photography is tricky but rewarding. If you’re busy making and selling knives, give me a shout. I’m happy to photograph them for you.
Get new lighting tutorials by email
When a new guide like this one goes up, be the first to know. A few emails a year, no spam.
I share the lighting setups and behind‑the‑scenes from shoots like this on Instagram.
Follow @robandrewphoto