How to Photograph a Glass Bottle
The Shot
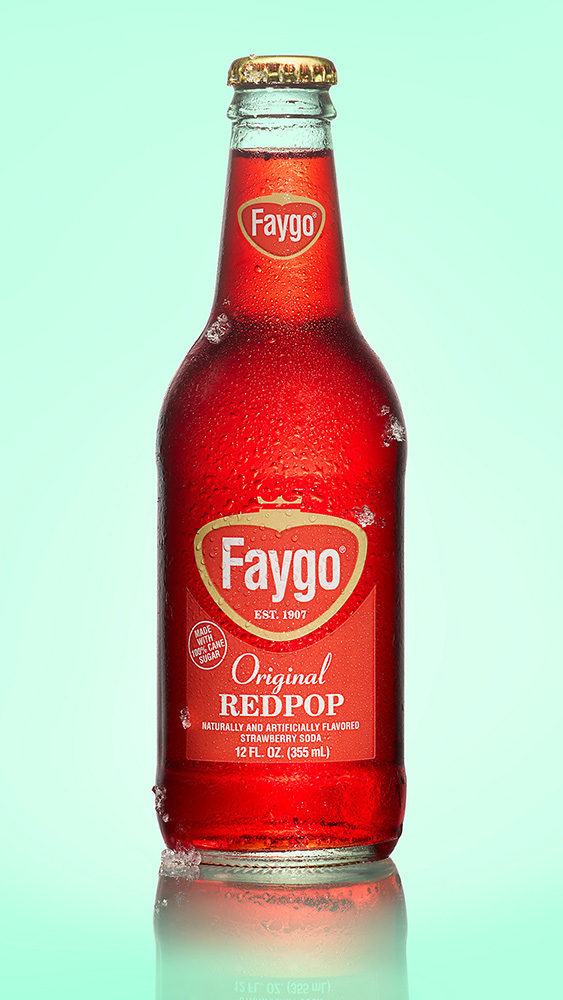
If you’ve ever attempted to photograph glass bottles, especially transparent ones, you probably know a few cuss words. Today we’re covering commercial beverage photography camera settings, lighting setup, and styling—plus common mistakes to avoid.
Camera Settings
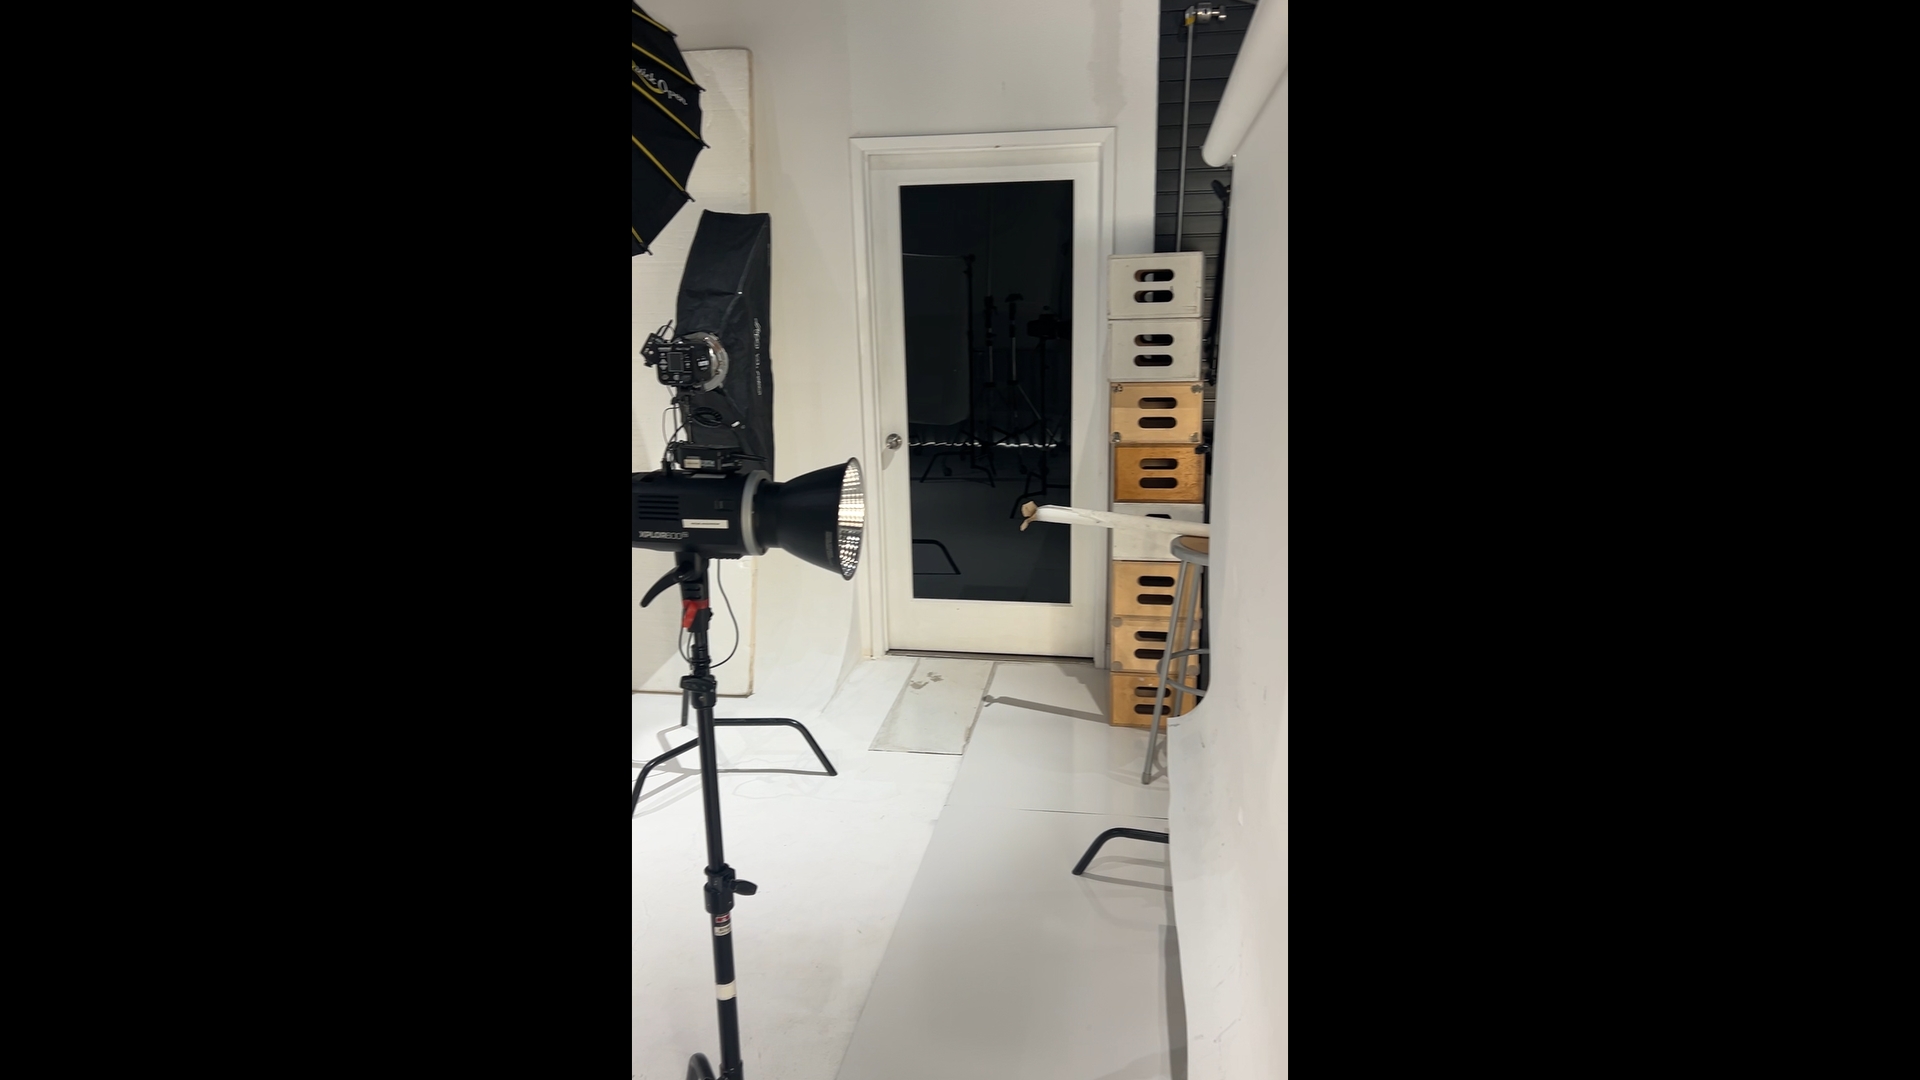
For most bottles, I am using a focal length of 100mm (on a 100mm macro lens). It tends to introduce less distortion and foreshortening of a bottle and we want things nice and straight and level. The longer focal length also helps narrow our field of view so that fewer distractions can be seen in the background. Given that I am working in my studio with strobes (very strong lighting), I use an ISO of 100 and an aperture of f/16 to get all parts of the bottle as crisp as possible. My shutter speed is not important. I simply need to sync my camera to my strobes. Just use your camera’s native maximum flash sync speed (1/125-1/250 for most modern cameras).
Lighting Setup
When working with liquids and glass, lighting is going to be the most critical factor. We want to keep things as simple as possible, but we also want to make sure that the label is clear and easy to read, the metal cap is looking beautiful, and the liquid inside looks both true to the product and also enticing. Oftentimes it’s wise to take separate shots for all of these components and simply layer them together in Photoshop to achieve the cleanest final result from multiple shots. This was my approach for the shot above. Let’s break down each element.
Label Light
The label light is a gridded strobe, mounted way up high on a stand. Since this light will be hitting the front of the bottle, we want it up high and angled down sharply so that the reflection of the light source in the glass is mitigated as much as possible. There will still be evidence in the form of small highlights, but they will be small enough to clone out in Photoshop.
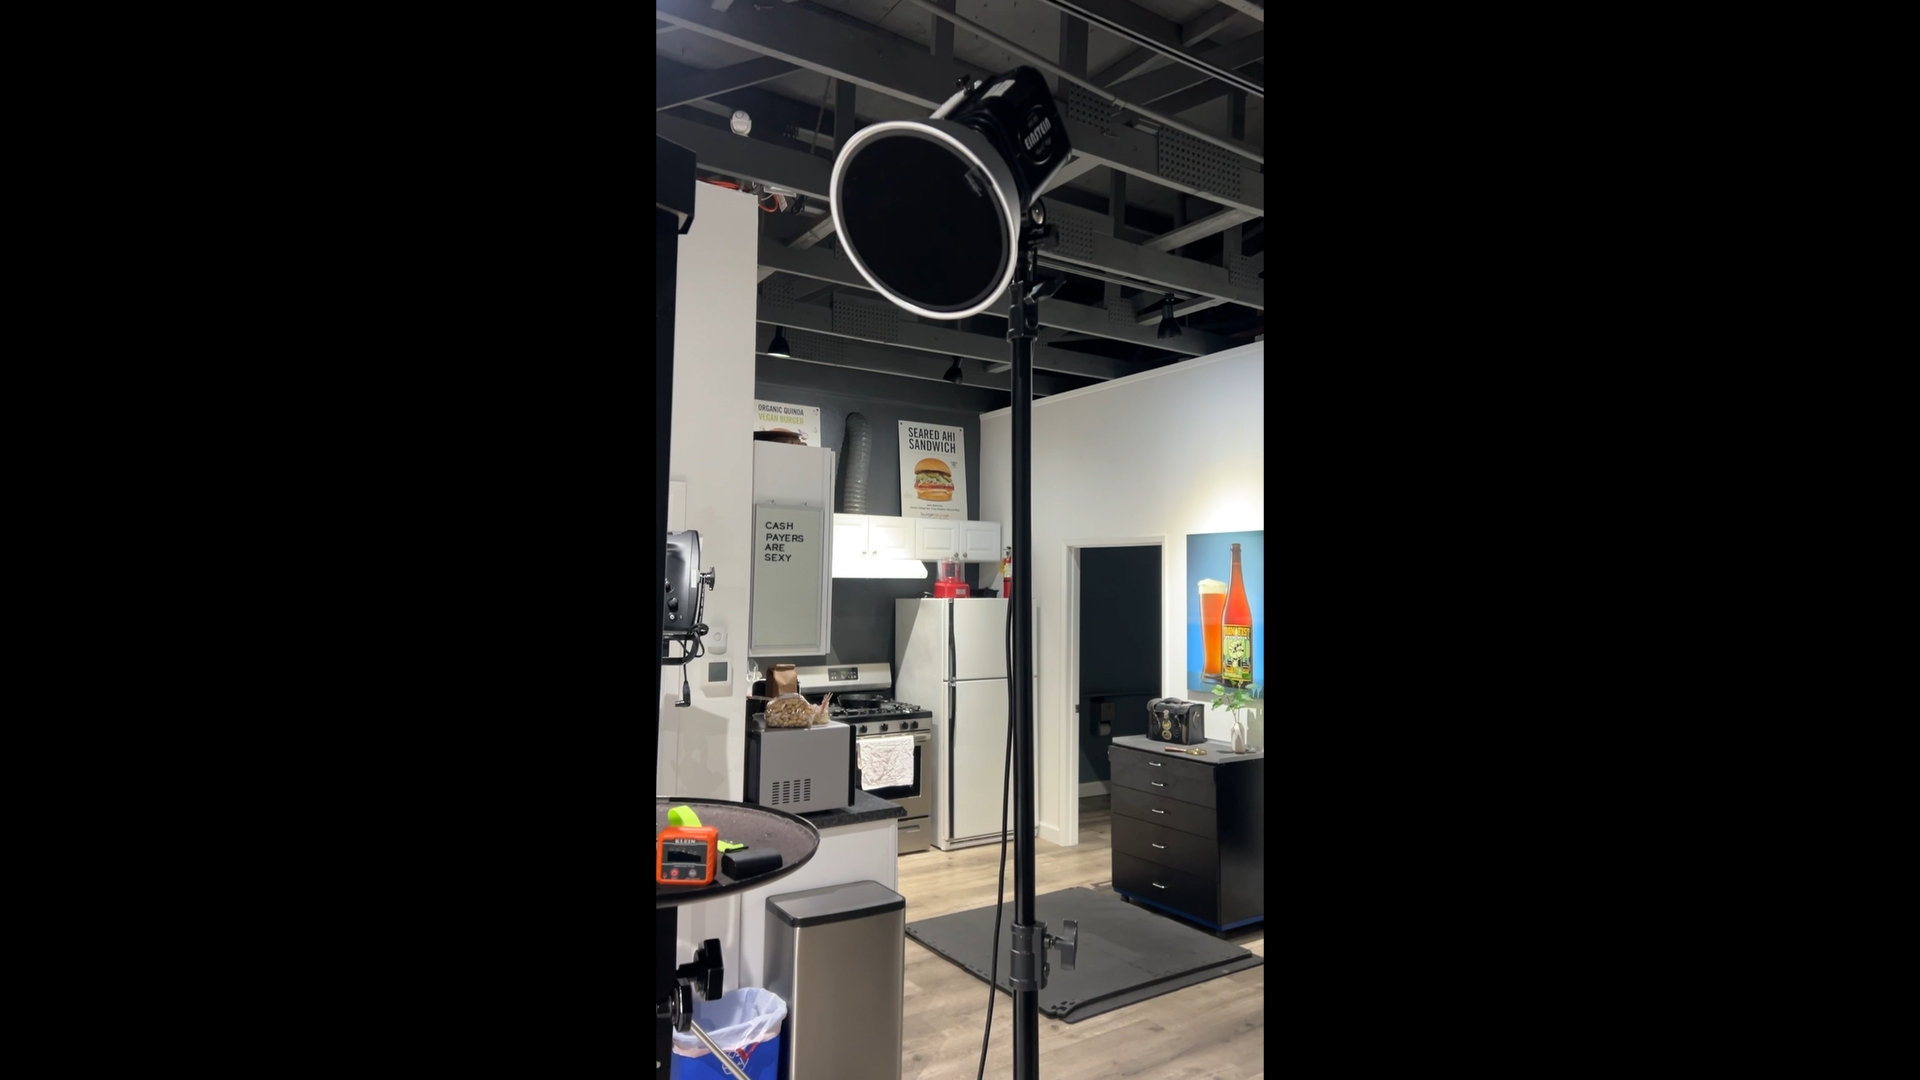
Bottle Cap Light
For the bottle cap, a softer light is usually going to look better so I’m using a strip softbox, boomed directly overhead and aimed straight down at the bottle cap. This is going to provide soft enough light to make metal look nice while still being compact and easy to wrangle. You can use a bigger source, but, since our subject is so small, there is no need to do so here.
Lighting the liquid
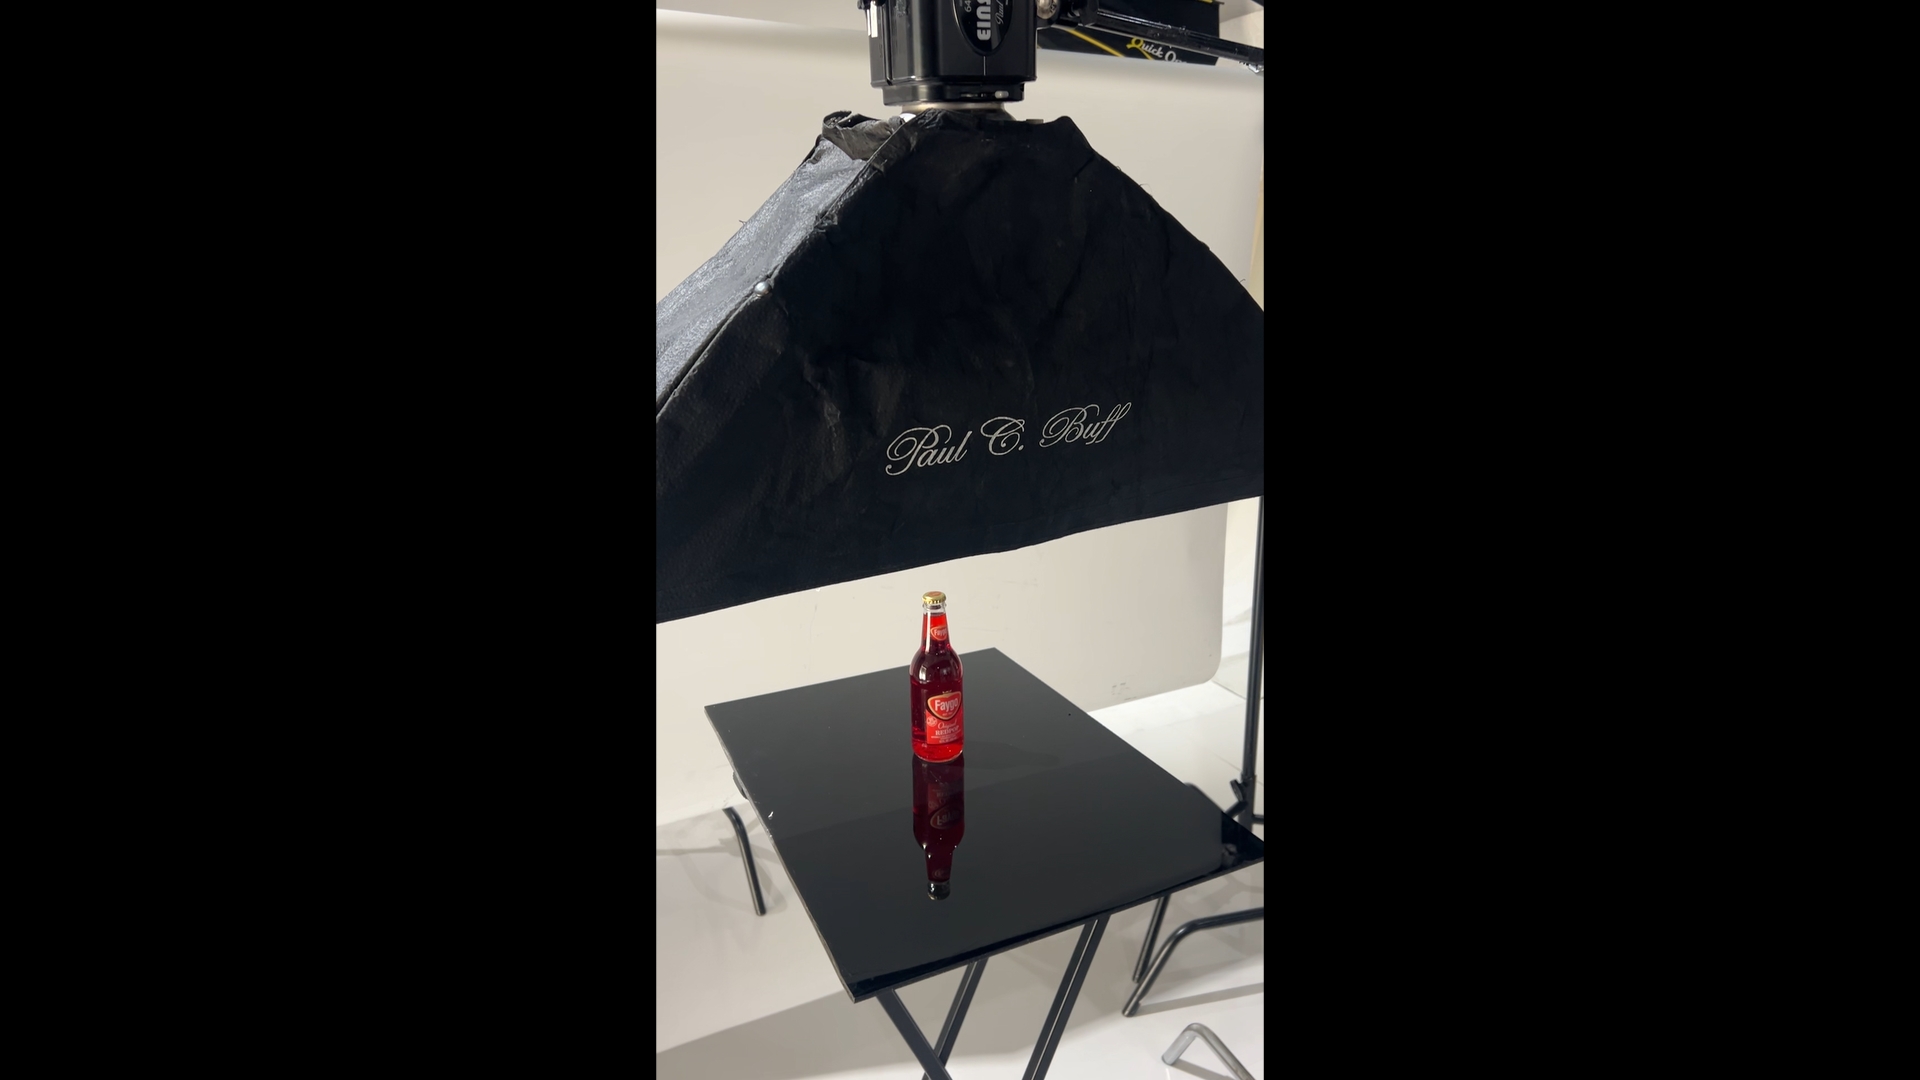
Backlighting is essential to make the liquid look good. I shoot a strobe through Savage Translum (a 5-foot roll of diffusion material) positioned behind the bottle. Naturally, this material is also serving as our background. Distance is important here. For various types of bottles and liquids, you’ll need to experiment with the distances: A) from the light to the diffusion material and B) from the diffusion material to the bottle. Only patience and trial and error will get you dialed in. I chose to change the color of the background in post production to give myself more options on selecting a final color.
Bottle Prep and Styling
Prep
The basics of bottle prep usually involve removing the rear label. The reason for this is that we need light to penetrate the glass and liquid. A rear label will partially block the light coming through the liquid. The rear label is also visible in the final shot or can cause diffractions or reflections in the glass which will be visible, and we don’t want that. A second concern will be selecting a good bottle. I always ask the client for multiple samples when possible because sometimes labels are crooked, glass may be flawed, or sometimes the entire bottle may lean slightly left or right. Manufacturing processes in glass are not perfect so it’s up to us as product photographers to choose the best possible sample.
Styling
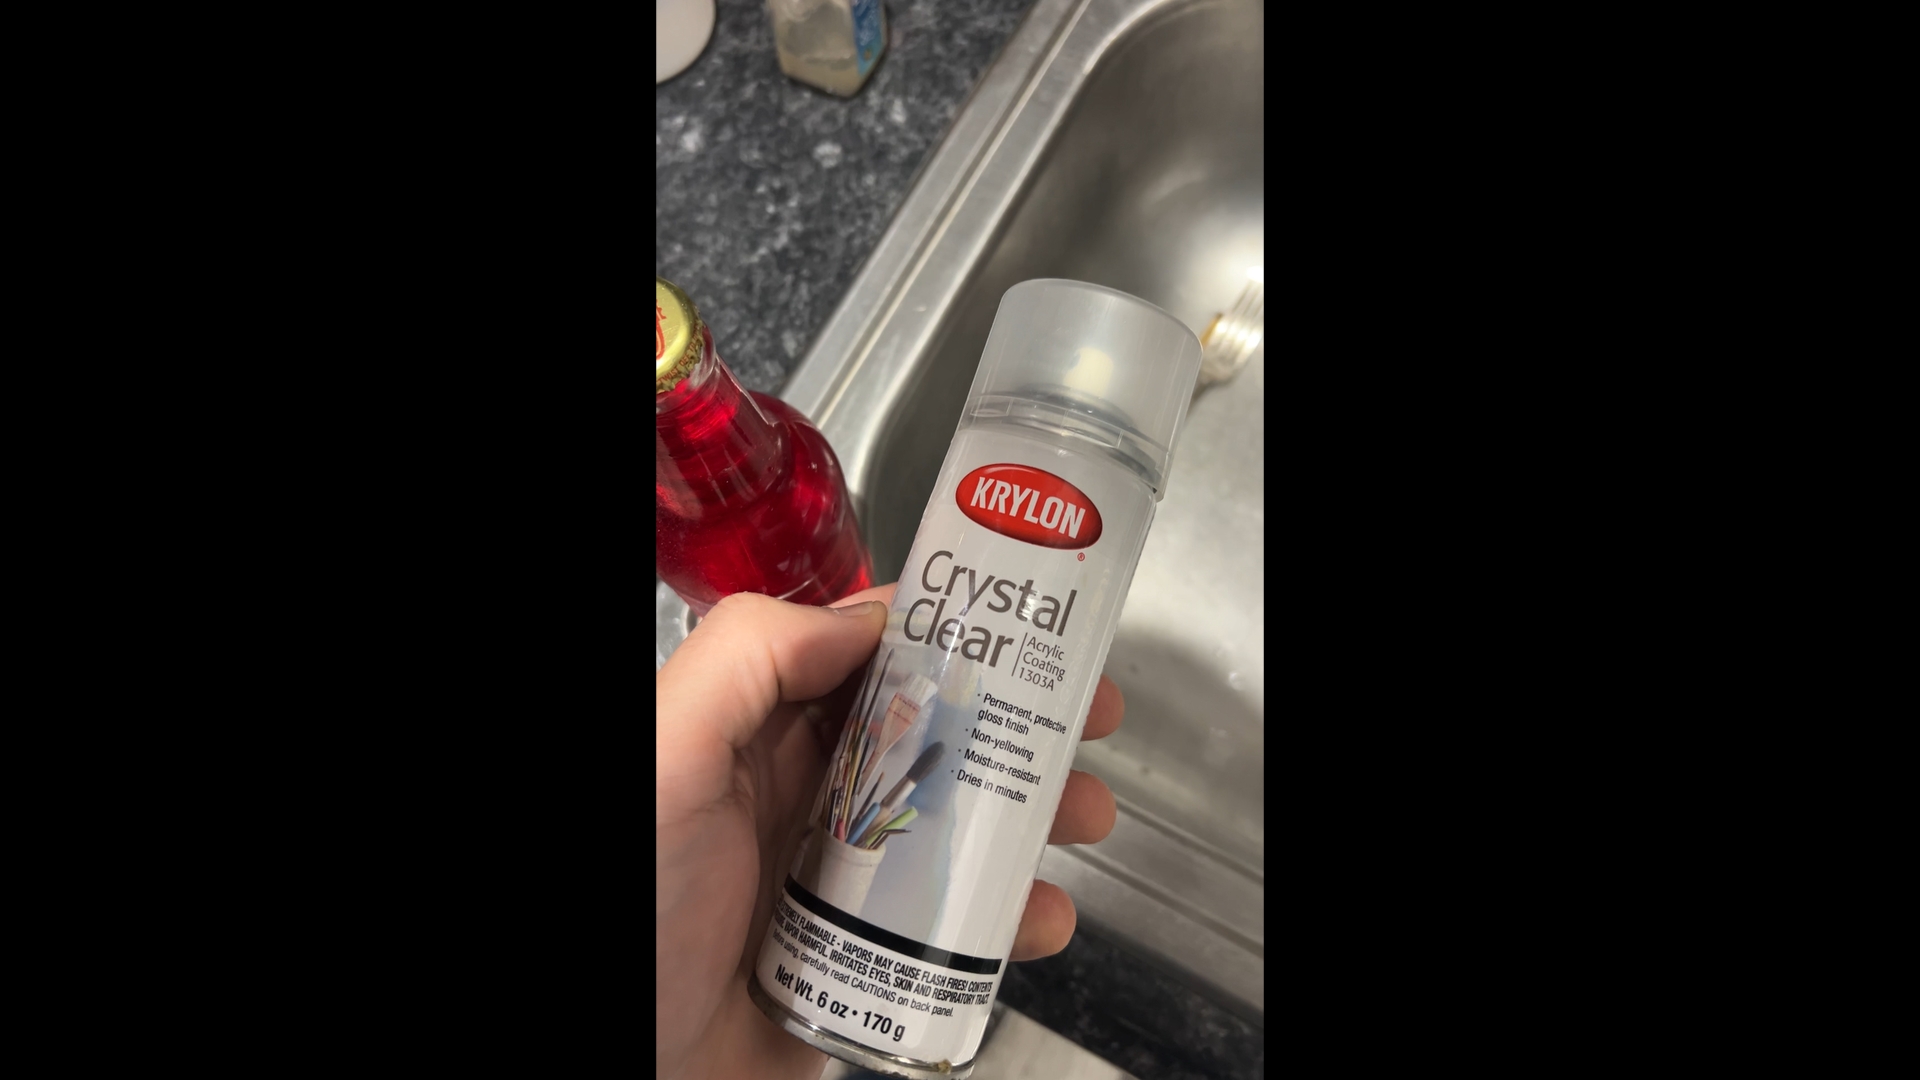
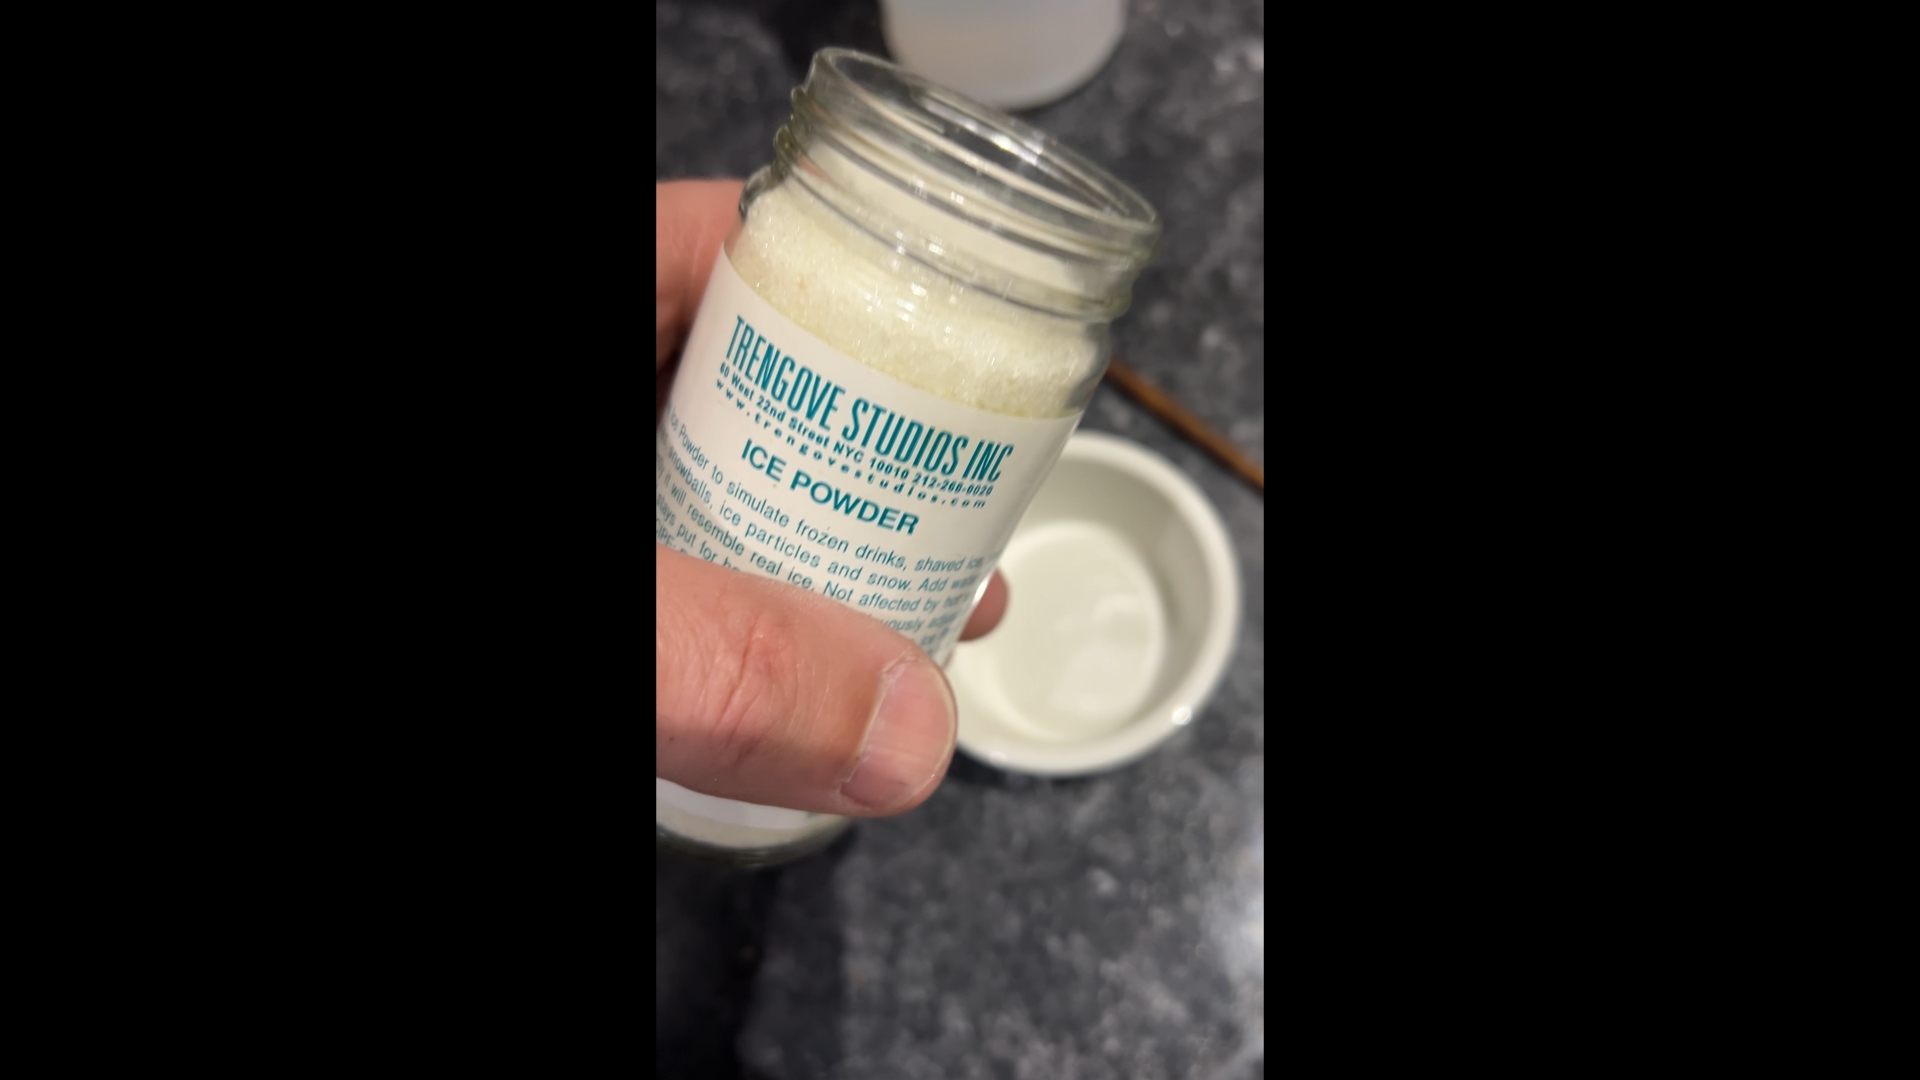
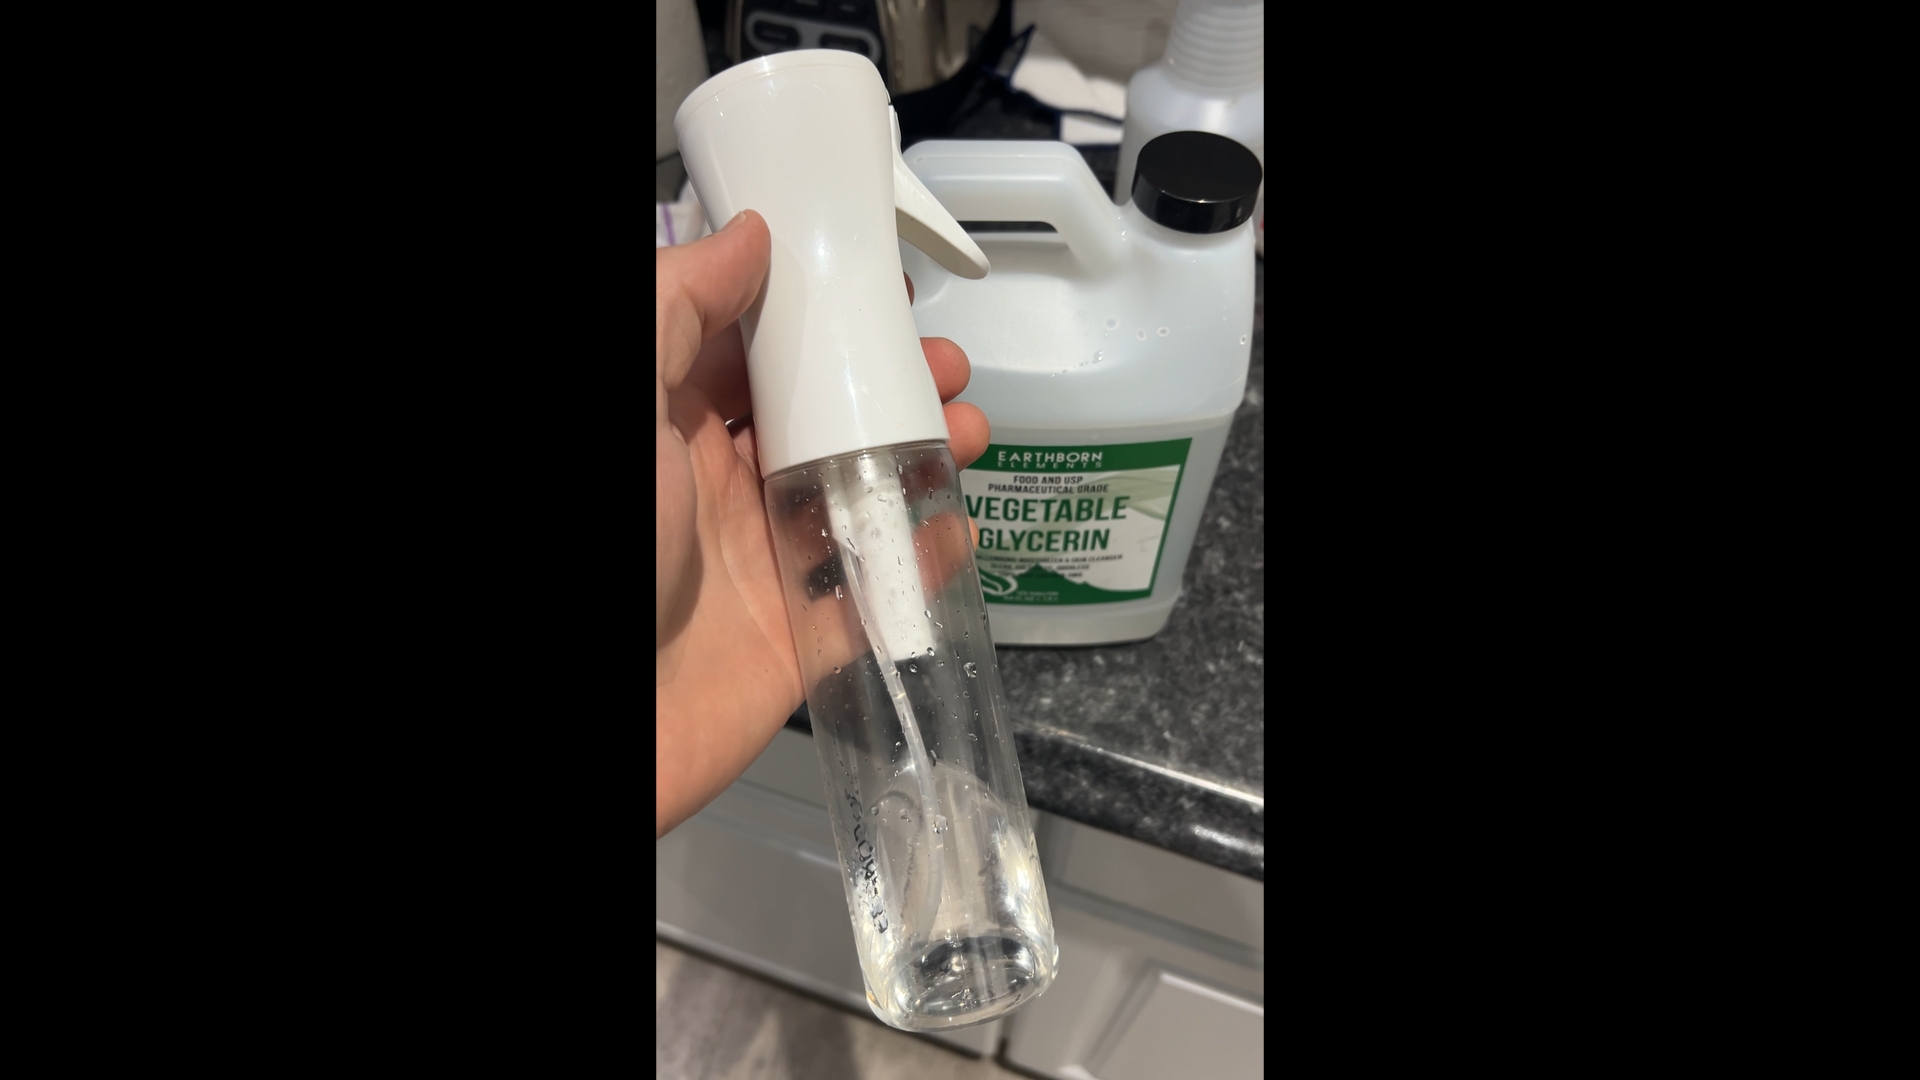
For this bottle, I wanted a fresh-from-the-cooler look which meant condensation droplets on the glass and a few choice ice crystals on parts of the bottle to really sell the concept. In order to achieve the droplets, it’s usually advisable to use a mixture of 50% water and 50% vegetable glycerin. It can be applied with any atomizer, but I like the Flairosol bottles. Before spraying the glycerin droplets on, it’s a good idea to clear coat the bottle with some Krylon crystal clear. This will be especially important when photographing bottles with paper labels. It serves to protect them from wrinkles and water stains during styling. It also helps the droplets have a tackier surface to stick to. Let it dry at least 30 minutes before applying the glycerin/water mixture. For the ice crystals, I use ice powder from Trengrove studios. This is a very unique item made for photo shoots. Mix with a few drops of water and you have beautiful, realistic-looking, gel-based ice which you can apply with a small paint brush. The crystals will retain their form for an hour or so on set, making them a better choice than real ice.
Photoshop
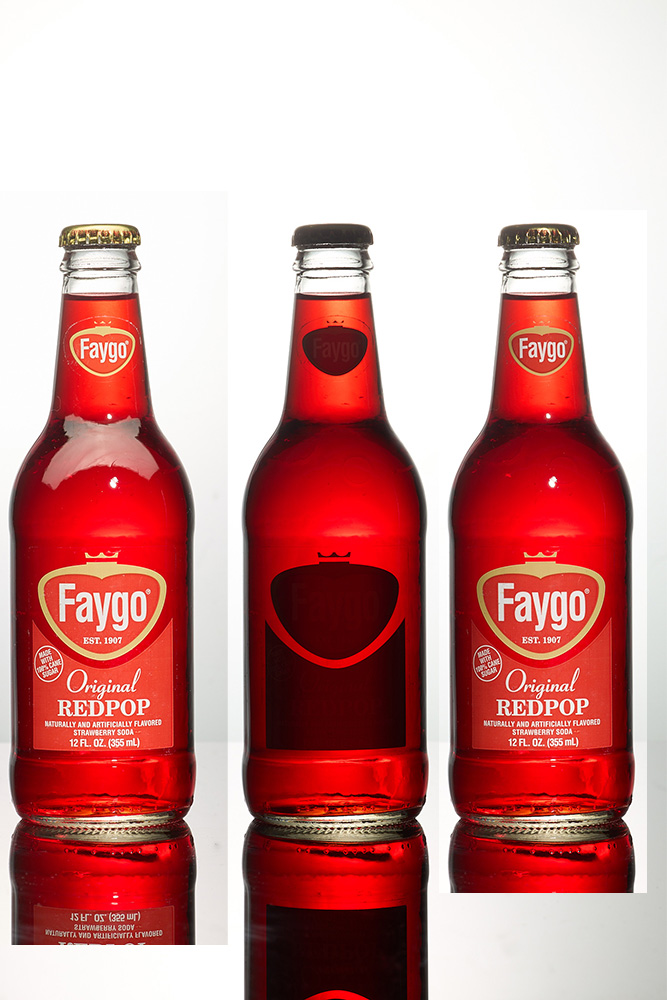
Above you can see three test shots for lighting setup. I took these again after styling the bottle with droplets and ice powder, but I like to get lighting established before doing any bottle dressing. The first shot will only be used for the cap, second for the liquid and main body and third for just the labels. I generally place my liquid shot on the bottom layer and simply align all the layers in a stack. Then I can select all the parts I want from secondary shots with the pen tool and unmask them. You’ll also notice, in the final shot, that I adjusted the position of the top label. They are rarely centered well from the factory.
Creative Choices
In terms of the final shot, I wanted to drop a complimentary color into the background. I knew this would likely be a light green hue around the same exposure value as my translum. I also wanted a vertical shot for social since I planned to drop this into the video tutorial below. I also prefer reflective surfaces for bottles so I shot this on black plexiglass for the strongest possible reflection. It’s easier to reduce reflection in post than to add it later, so I always shoot with maximum reflection. For the ice crystals I painted them on to form an “S” shape down the length of the bottle as a subtle visual hook.
Bottle photography requires patience and precision, but these techniques—proper lighting separation, careful prep work, and thoughtful styling—will elevate your commercial work. The investment in tools pays off in the quality and efficiency of your shoots.
Ready to elevate your beverage brand with professional product photography? I work with San Diego County businesses and beyond to create compelling bottle shots that sell. Contact me to discuss your next shoot.
Want more photography tips? Subscribe to my YouTube Channel or Follow me on Instagram @robandrewphoto
This Post Has 0 Comments